
Fun Styles
Love is in the hair this Valentine’s Day! Whether it’s for a party, daddy-daughter dance, or just for fun, these adorable Valentine’s hairstyles are perfect for all hair types—straight, curly, wavy, or coily. From heart-shaped buns to sweet and simple styles, our easy-to-follow tutorials and styling tips will help you create the perfect look at home. Make this Valentine’s Day extra special and memorable with these fun, stylish hairdos! Let’s get styling!
Queen of Hearts
What You’ll Need
- Hair elastics
- Bobby pins
- Bows (optional)
- Section the Hair – Section off about one-third of your child’s hair from the front. Pull the rest of the hair back so that it stays out of the way. Then, create four equal sections across the front section and secure each with a hair elastic, creating four small ponytails.
- Flip the Sections – Taking the front of a ponytail, split the base into two equal sections, creating a little hole, and pull the ponytail through. Your ponytail should now fall towards your child’s face. Repeat this on the remaining ponytails.
- Rock Your Crown – Taking a ponytail, split it into two even strands. Tightly twist one strand about halfway down the length of your child’s hair. Have your child hold the twist to keep it in place or secure it with an elastic band. Repeat this on the other strand and secure them together with an elastic.
Then, take your twists and position them to fall away from your child’s face, towards the back of their head. Hold the twists by the elastic band and gently push the twists forward. They should each curve at the base, forming a heart shape. Once you’re happy with the positioning and shape, secure it with a bobby pin near the hair elastic.
Repeat on each ponytail and rock your crown of hearts!
Love Bun
What You’ll Need
- Hair elastics
- Bobby pins
- Bun Maker
- Bows (optional)
- Shape Your Heart – Take your bun maker, pinch the bottom of it and secure two hair elastics around it so that it creates a point and holds its shape. This will be the bottom of your heart!
Then, pinch the top left side of your bun maker and secure two hair elastics around it to create another point. Repeat this on the right side. The bun maker should be more of a heart shape now!
- Ponytail Time – Put your child’s hair into a ponytail. Then, take your bun maker and carefully pull the ponytail through the middle while being mindful not to disturb the heart shape you created. Position the bun maker at the base of the ponytail, ensuring that the two points are at the top.
- Create the Bun – Once you’re happy with the positioning of the bun maker, spread the hair evenly around the bun maker. Then, take a hair elastic and slide it over the bun to secure the hair.
Pro Tip: Take any remaining hair sticking out of the bottom of the bun maker and twist it around the base of the bun and secure with bobby pins.
- Shape the Bun – To emphasize the heart shape, gently tug on the hair where the top two points were created. To add more definition, take a bobby pin in between the points and secure a small bit of hair down into the bun maker. Keep adjusting to your liking and you’re ready to spread the love!

Criss-Cross My Heart
What You’ll Need
- Hair elastics
- Bobby pins
- Bows (optional)
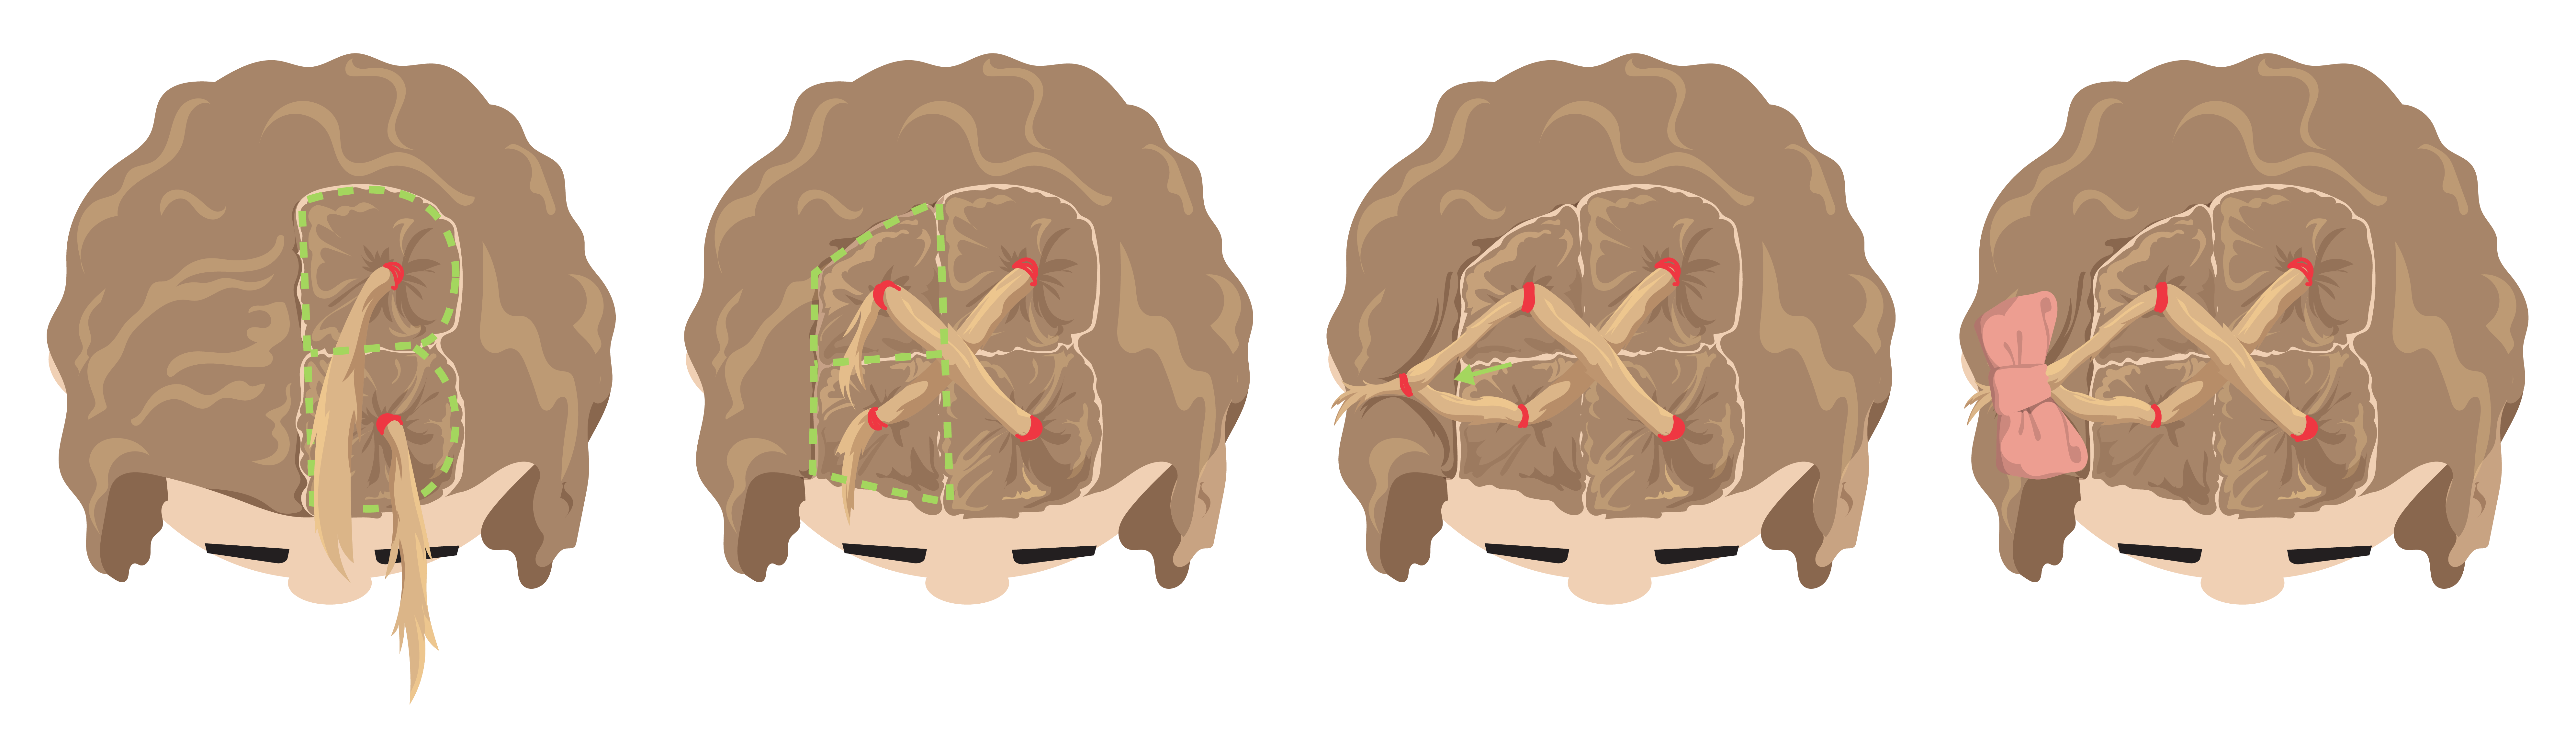
- Start with Half Circles – Starting at the top of your child’s head, create two equal sections next to each other that are half-circle shaped. This will create the top of the heart shape. Secure each section with a hair elastic.
- Cross the Strands – Then, right under your half circles, create two equal sections, incorporating the strands from the previous opposite sections. For example, the hair from the top left section will be incorporated into the following right section and vice versa, forming an X shape. The outermost sides of each section should be slightly diagonal, following the same angle as the half-circle sections. Secure each section with a hair elastic.
- Finish the Heart – For the last section, take the two strands from the previous sections and secure them together, forming a V shape. This section should also follow the same diagonal angle. Add any bows or accessories to finish off your look!
No matter how you celebrate, these Valentine’s Day hairstyles are sure to make your little one feel extra special. From playful heart-shaped buns to simple and sweet styles, there’s something for every child and hair texture. With our easy-to-follow tutorials, you can create festive looks at home that are as fun to make as they are to wear. So, grab your hair accessories, get styling, and make this Valentine’s Day one to remember!
Don’t forget to share your beautiful creations with us online by tagging us @PigtailsAndCrewcuts!