
Fun Styles
Make the holidays extra cool with a kid-friendly DIY hairstyle. Join holiday cheer with adorable hairstyles by adding a touch of magic to your child’s look! For extra magic, finish any of these hairstyles with glitter hairspray to be merry and bright.
Jolly Space Buns
What You’ll Need
- Hair elastics
- Bobby pins
- 2 Mini ornaments
- Set Up the Ornament Pins – Take each ornament, and slip a hair elastic through the top opening. Then, loop the hair elastic through itself, securing it onto the ornament. Lastly, slide the bobby through the hair elastic loop, creating your ornament hair pins!
- Create Your Pigtails – Part your child’s hair down the center and create a pigtail on each side of your child’s head. Then, place one ornament pin at the base of each pigtail.
Tip: For added texture, braid your child’s pigtails and secure with a hair elastic! - Rock Your Space Buns – Take one pigtail, and wrap it around the ornament pin to create a bun. Once you are happy with the placement, bobby pin the bun in place. Repeat on the other side. Now you’re ready to sleigh the holidays away with your jolly space buns!

Christmas Tree Braids
What You’ll Need
- Hair elastics
- Green ribbon
- Star hair clip
- Small decorative clips (Optional)
- Start the Tree – Separate the top third of your child’s hair and tie it back with a hair elastic. Then take the ponytail, and divide it into two even sections. Take the right section of hair and clip it out of the way.
- Braid Away! – Now we’re going to do a lace braid. To complete this braid, take the left section of hair and begin a typical 3-strand braid, adding extra hair only with the leftmost strand. Ensure that as you braid, you are guiding the hair down at an angle. Continue the braid, stopping just behind the bottom of your child’s ear. Once you reach this point, end the braid with a few rows of a typical 3-strand braid and tie it off with a hair elastic.
Repeat on the right section of hair that was clipped out of the way, pulling in hair through the right strand. - Lace Your Tree – Once both your braids are complete, take your ribbon, and begin to lace it through the top loops created by the braids on both sides. Then, cross the ribbon strands and lace them through the next loops all the way down the braids, kind of like lacing shoes! Adjust the lace as needed to lie flat and neatly.
When you’re finished lacing, join the two braids and secure them together with a hair elastic. Feel free to tie the remaining ribbon into a bow or secure it and cut off the excess. Get creative! - Decorate Your Tree – Once you’re happy with your ribbon, it’s time to add the finishing touches! Add a decorative hair clip to the top of your tree as a tree topper and your favorite twist-on hair jewels or barrettes as ornaments on the tree.
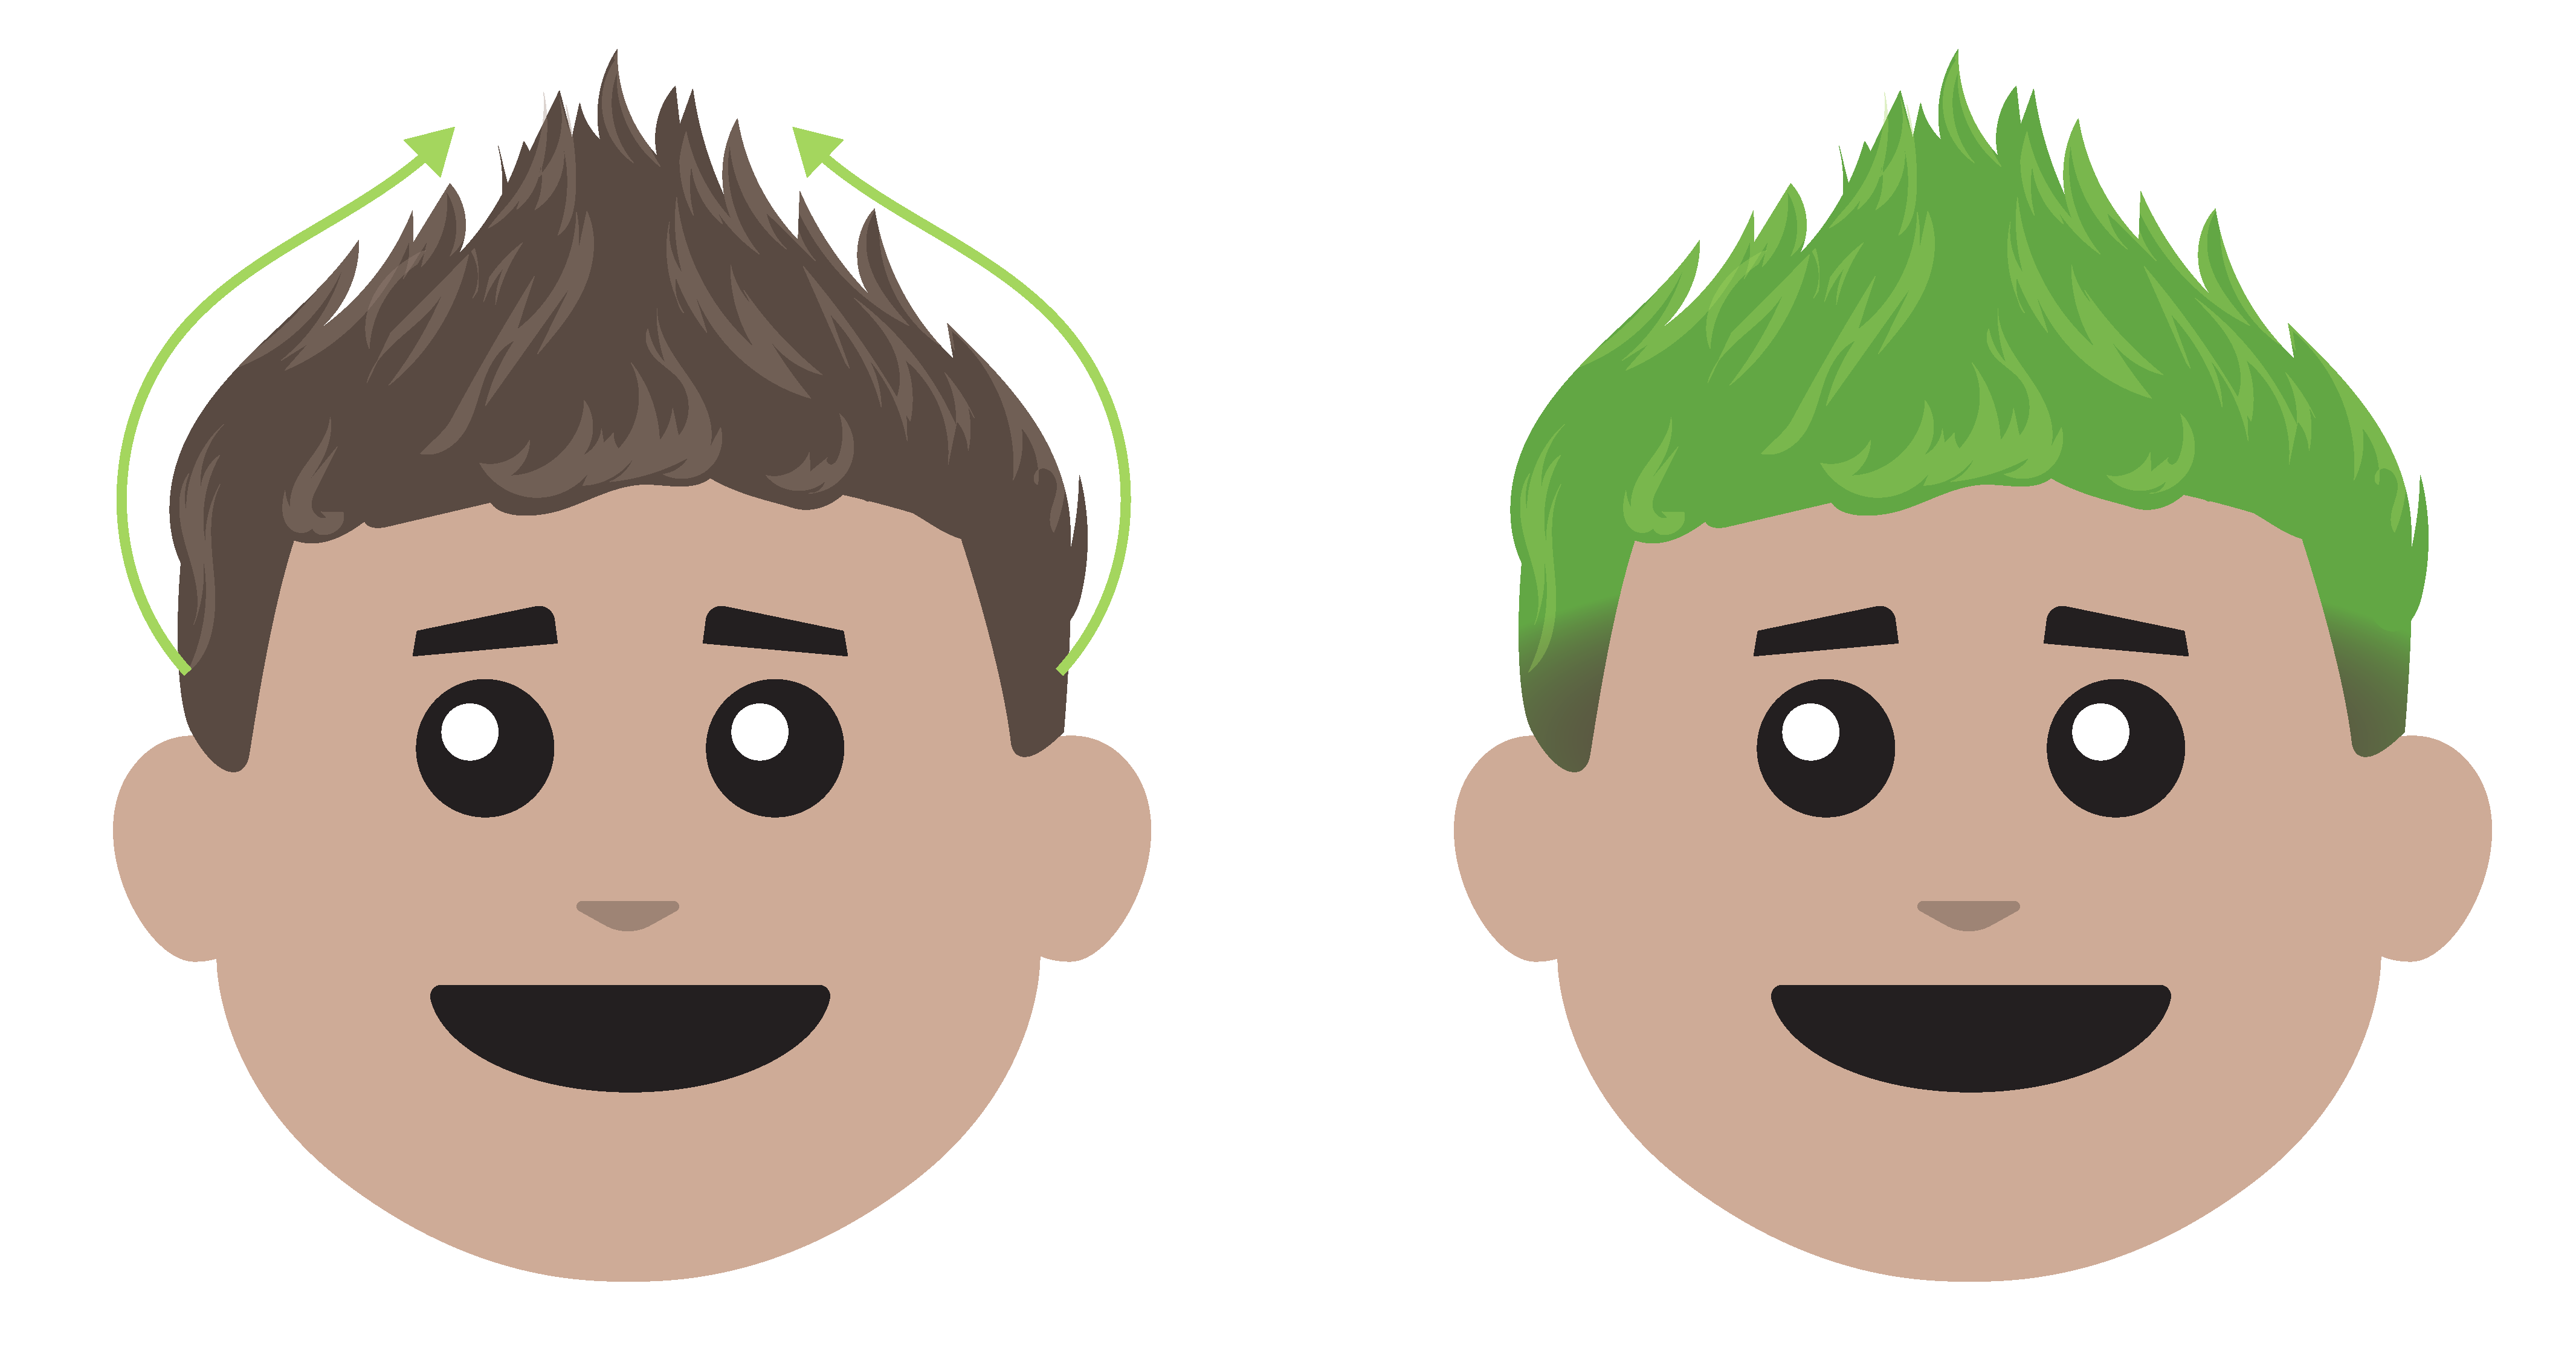
Merry Grinch-mas - Boy
What You’ll Need
- Gel
- Green temporary hair color spray
- Shape the Hair – Taking the gel, shape your child’s hair upwards to form a shape resembling a cowlick mixed with a mohawk.
- Go Green – Once you’re happy with the shape, finish off your child’s hair with green temporary hair color spray to Grinch it up!
Fancy Bubble Ponytail
What You’ll Need
- Hair elastics
- Bows
- Begin the Bubble Braids – Pull your child’s hair up into a high ponytail and secure with a hair elastic. Then, go down about 4 finger-widths down and add a second hair elastic. Continue until you reach the end of the ponytail.
- Fluff it Up – Take the top section of hair in between the elastics and gently pull to fluff it up. Fluff the remaining sections of hair to your liking.
- Finish Off Fancy – To complete the look, take your favorite bows and place them over the hair elastics. Now your child is ready to flaunt their fabulous bows with this fancy hairstyle!