
Fun Styles
Get ready to add some extra fear factor this year! Take your child’s costume to the next level with a DIY Halloween hairstyle that’s perfect for kids. From creepy crawlers to magical creatures, we’ve got the perfect hairstyles to complete your child’s spooky ensembles.
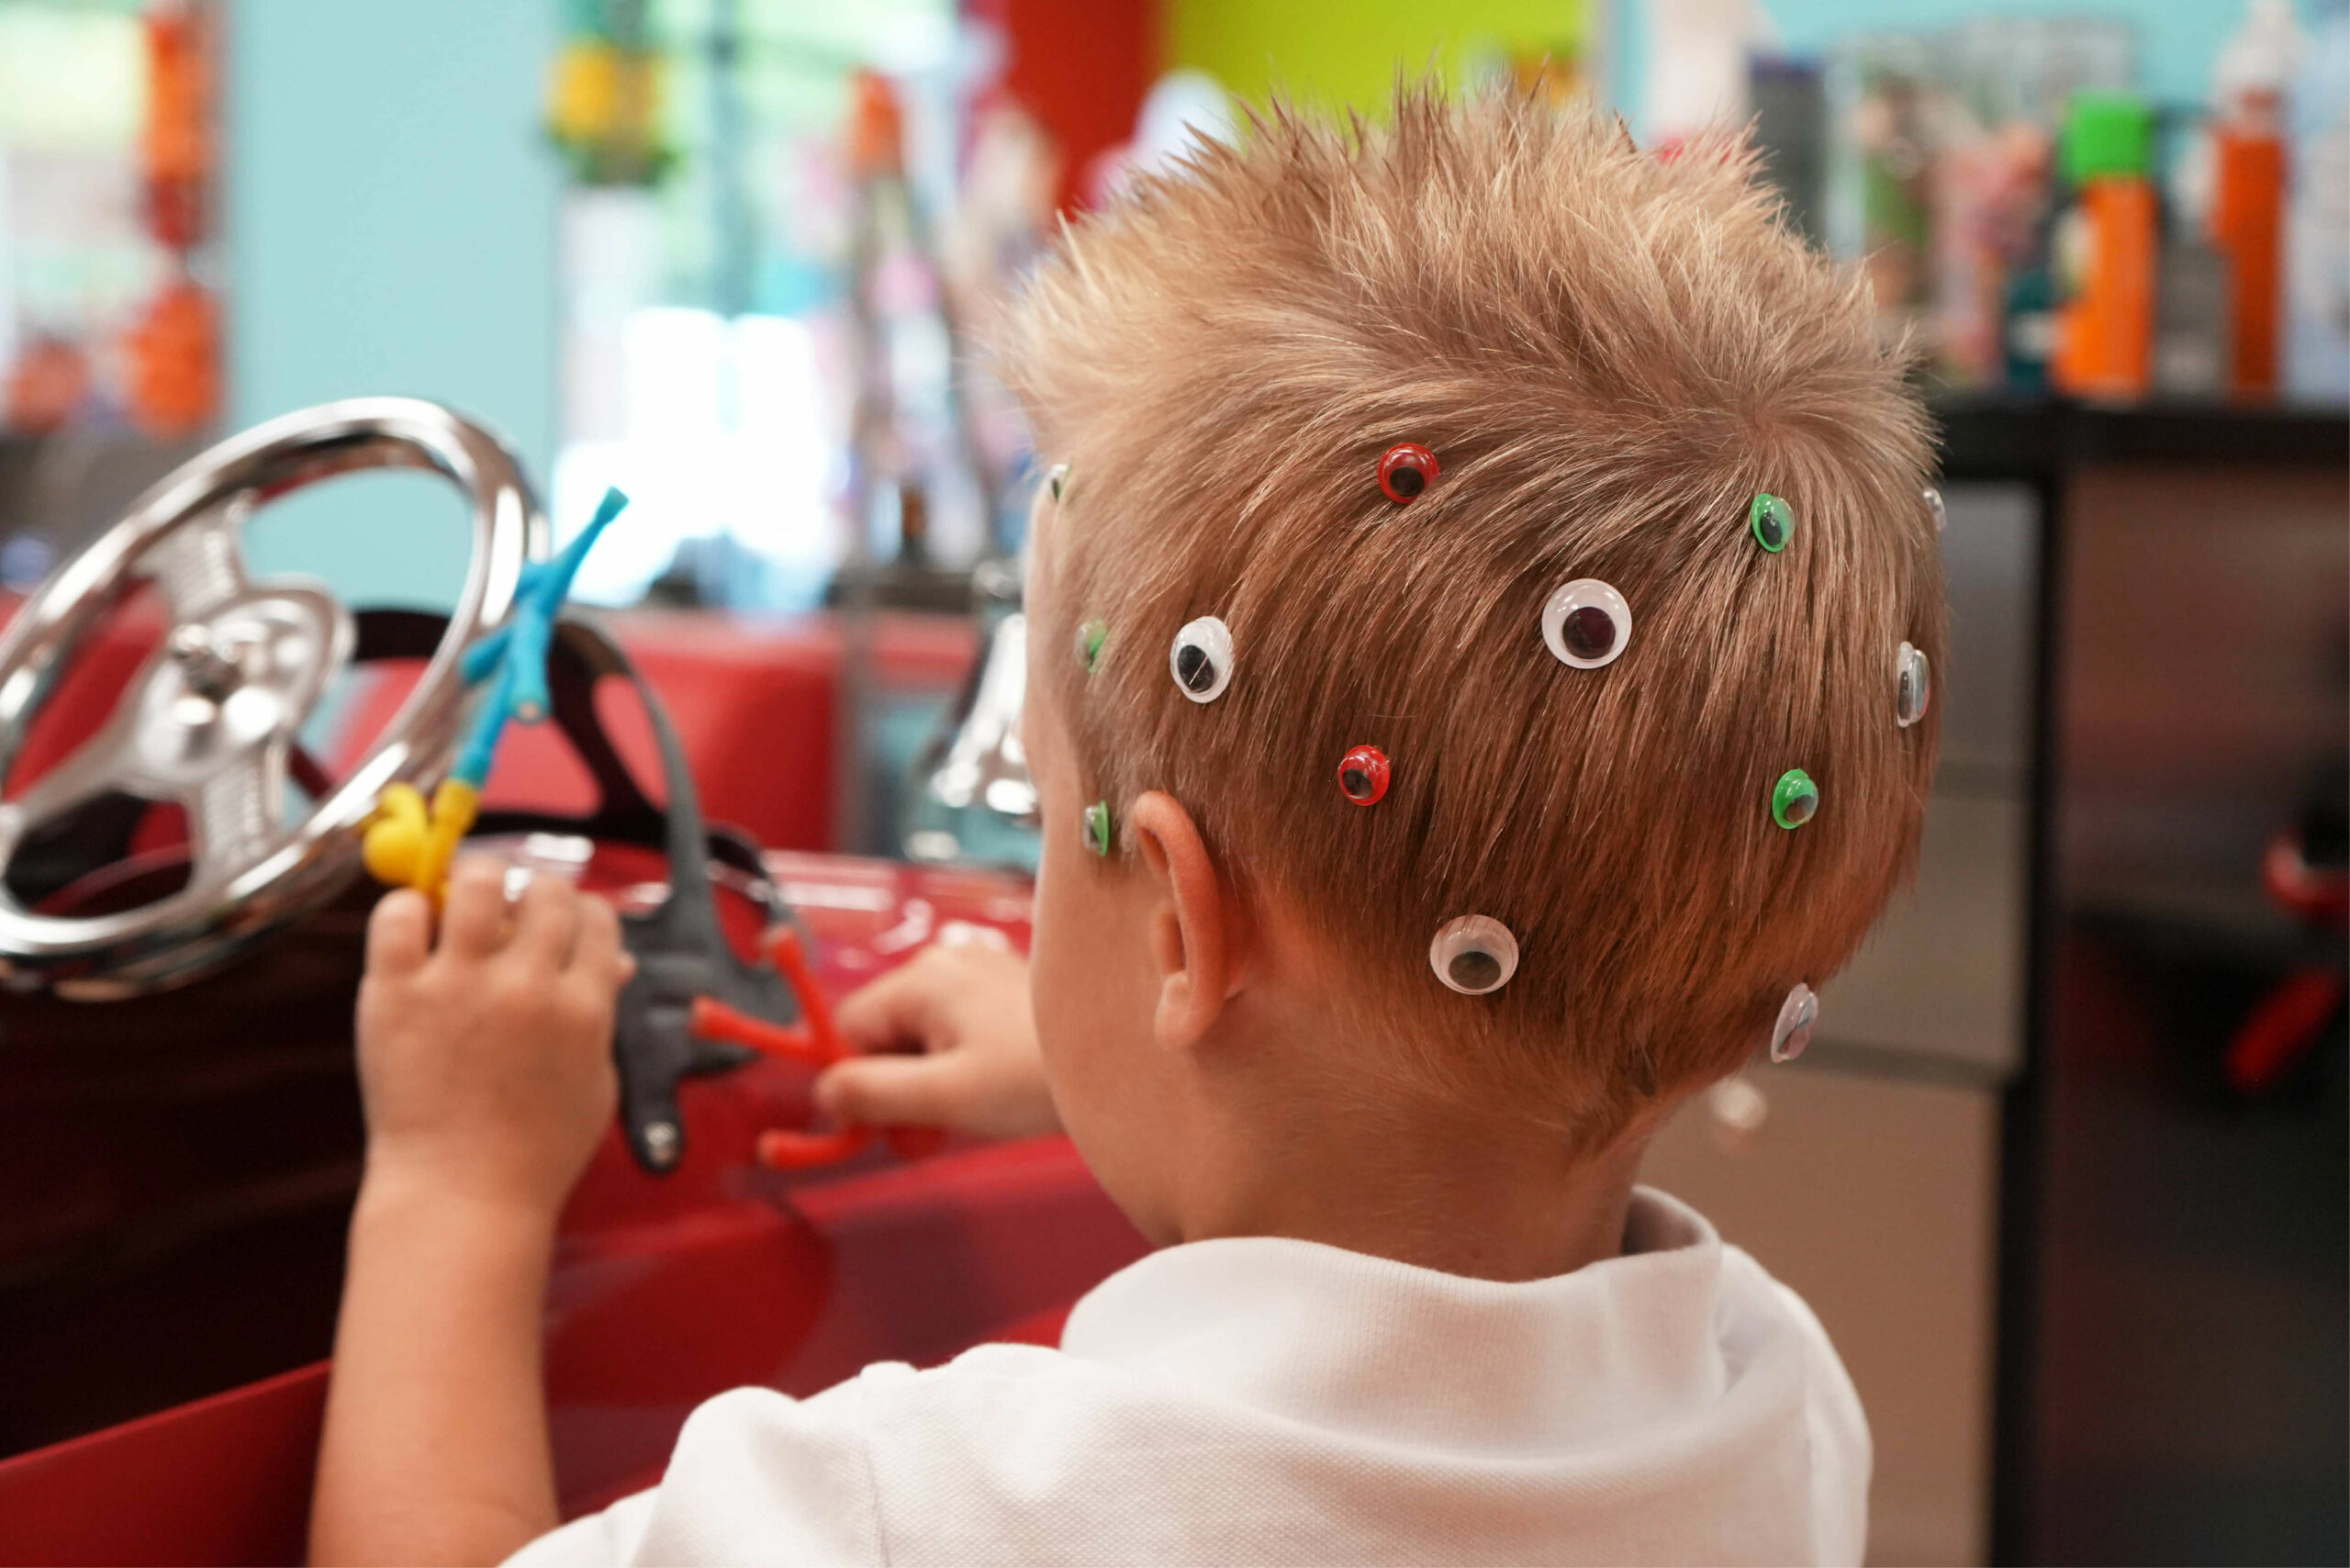
All Eyes on Me
What You’ll Need
- Strong hold gel
- Hair net
- Hot glue
- Googly eyes
- Temporary hair color spray (Optional)
- Your choice of color
- Get Crafty – Use hot glue to glue googly eyes sporadically throughout the hair net.
NOTE: If you plan to color spray your child’s hair, we recommend spraying the hair net as well, before gluing. - Look Alive – If desired, spray your child’s hair with temporary hair color and allow it to dry. Carefully place the hair net over your child’s head and you’re done! With this hairstyle, all eyes are sure to be on your kid.
Optional: If you don’t have a hair net, use a strong hold gel to secure the googly eyes directly to your child’s hair.
Pumpkin Spooky Bun
What You’ll Need
- Hair elastics
- Hair pins
- Bobby pins
- Googly eyes
- Black & green construction paper
- Scissors
- Tape
- Temporary hair spray color
- Orange
- Bun maker (Optional)
- Hot glue (Optional)
- Prep for your spooky style! – Feel free to get creative! The instructions below are guidelines. Make adjustments to bring your own creations to life.
Using the black construction paper, cut out three small triangles. These will serve as the eyes and nose. For the mouth, use black construction paper to cut out a half-circle. With this half circle, cut out one square on the top and another square on the opposite side of the bottom.
Then, use green construction paper to cut out a curved horn shape. This will be the pumpkin’s stem. - Assemble! – Once all of your pieces are cut out, attach each piece to the top of a hairpin with tape. For extra security, you can attach the construction paper to the pin with hot glue.
NOTE: The previous steps can be done in advance. This can also serve as a quick and fun craft to do with your child! - Create the Body – Pull your child’s hair back into a high ponytail at the top of their head and secure it with a hair elastic. Then take the ponytail, and twist it and wrap it around the base to create a bun of your desired shape. For the Pumpkin Bun, aim for a more donut shape that stays closer to the base. Fluff the bun to your liking. Secure the bun with bobby pins to keep it in place.
NOTE: For a fuller and more round bun, consider using a bun maker. - Bring Your Creation to Life! – Spray your bun with temporary hair color. Once dry, begin to insert the hairpins with the construction paper and/or googly eyes into place to your liking. Finish off with hairspray to bring your Halloween hairstyle to life!

Eepy-Creepy Octopus Bun
What You’ll Need
- Hair elastics
- Hair pins
- Bobby pins
- Googly eyes
- Black construction paper
- Scissors
- Tape
- Hair chalk or temporary hair spray color – multiple
- Bun maker (Optional)
- Hot glue (Optional)
- Prep for your spooky style! – Feel free to get creative! The instructions below are guidelines. Make adjustments to bring your own creations to life.
Using the black construction paper, cut out a thin, curved line to use as the smile. - Assemble! – Once all of your pieces are cut out, attach each piece to the top of a hairpin with tape. For extra security, you can attach the construction paper to the pin with hot glue. Tape or glue 2 googly eyes onto the top of a hair pin.
NOTE: The previous steps can be done in advance. This can also serve as a quick and fun craft to do with your child! - Create the Body – Pull your child’s hair back into a high ponytail at the top of their head and secure it with a hair elastic. Then take the ponytail, and twist it and wrap it around the base to create a bun of your desired shape. Make sure that there longer strands extending below the bun for the octopus legs. Fluff the bun to your liking. Secure the bun with bobby pins to keep it in place.
NOTE: For a fuller and more round bun, consider using a bun maker. - Bring Your Creation to Life! – Section out the “legs” and begin to add different colors to the bun and “legs”. You can use hair chalk or temporary hair color. Once dry, begin to insert the hairpins with the construction paper and googly eyes into place to your liking. Finish off with hairspray to bring your Halloween hairstyle to life!
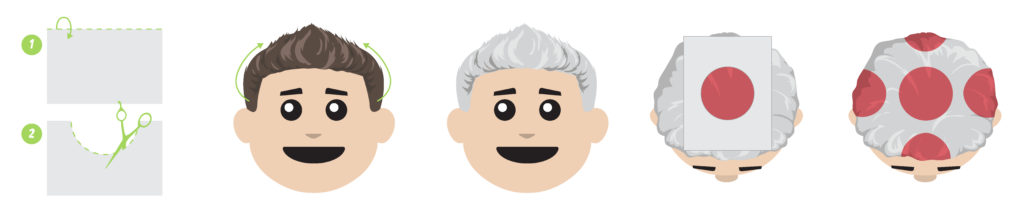
Toad-ally Cool Hair - Boy
What You’ll Need
- Gel (Optional)
- Temporary hair color spray
- Red & White
- Paper
- Scissors
- Create your Stencil – Take a piece of paper and fold it in half, hamburger style. Cut out a half circle about the size of your fist from the folded paper. Unfold the paper. This circle will be your stencil.
- Shape the Hair – Depending on your child’s hair length, you may skip this step. If your kid has longer hair, gel it upwards to create a domed mushroom top shape. Once you’re happy with your shape, spray all of the hair white with the temporary hair color spray.
- Spot the Fungi! – Taking your stencil, put it against your kid’s hair and spray a total of 5 circles with the red temporary hair color spray. The circle pattern is as follows:
– 1 circle in the center of the head
– 1 circle at the front of the head
– 1 circle in the back of the head
– 1 circle on both sides of the head
If your pattern feels like it’s looking empty, feel free to add additional circles to fill in gaps.
Toad-ally Cool Hair - Girl
What You’ll Need
- Pink beanie or bonnet
- White construction paper
- Temporary hair color spray
- Pink & White
- Hair elastics
- Scissors
- Tape
- Create your Circles – Take a piece of paper and fold it in half, hamburger style. Cut out a half circle about the size of your fist from the folded paper. Unfold the piece you cut out to reveal your circle. Cut out 5 of these circles in total.
- Spot the Fungi! – Take your 5 white circles, and tape them onto your pink beanie (or bonnet) in the following pattern:
– 1 circle in the center of the head
– 1 circle at the front of the head
– 1 circle in the back of the head
– 1 circle on both sides of the head - Bubble Braids – Part your kid’s hair down the middle into two sections. Use a hair elastic to tie each section into low pigtails. Then, take one pigtail, and add a hair elastic about three finger lengths down. Continue adding elastics all the way down the pigtail, keeping even sections. Repeat on the other side. The hair in between each band will be the “bubbles”.
Take hair from each bubble section and start to pull pieces of hair up and out to create volume. Repeat on the other side. Once complete, spray both pigtails with the pink temporary color. Finally, spray small white dots on the last bubble of each pigtail. Finish off with hairspray to complete your toad-ally cool look!

Monster Spooky Bun
What You’ll Need
- Hair elastics
- Hair pins
- Bobby pins
- Googly eyes
- Construction paper
- Your child’s favorite color & white
- Scissors
- Tape
- Temporary hair spray color
- Your child’s choice
- Bun maker (Optional)
- Hot glue (Optional)
- Prep for your spooky style! – Feel free to get creative! The instructions below are guidelines. Make adjustments to bring your own creations to life.
Using the black construction paper, cut out a thin, curved line to use as the monster’s smile. Taking construction paper in the color of your child’s choosing, cut out two wing shapes. Then, taking white construction paper, cut out a thin triangle to use as the horn.
- Assemble! – Once all of your pieces are cut out, attach each piece to the top of a hairpin with tape. For extra security, you can attach the construction paper to the pin with hot glue. For the Monster Bun, glue a googly eye onto the top of a hair pin.
NOTE: The previous steps can be done in advance. This can also serve as a quick and fun craft to do with your child! - Create the Body – Pull your child’s hair back into a high ponytail at the top of their head and secure it with a hair elastic. Then take the ponytail, and twist it and wrap it around the base to create a bun of your desired shape.For the Monster Bun, aim for a more dome shape. Fluff the bun to your liking. Secure the bun with bobby pins to keep it in place.
NOTE: For a fuller and more round bun, consider using a bun maker. - Bring Your Creation to Life! – Spray your bun with temporary hair color. Once dry, begin to insert the hairpins with the construction paper and/or googly eyes into place to your liking. Finish off with hairspray to bring your Halloween hairstyle to life!
Bowser
What You’ll Need
- Gel
- Temporary hair color spray
- Red
- Headband with horns
- Green face paint (Optional)
Spike the Hair – Take your gel and begin to spike your child’s hair up to your liking.
Bring on the Heat! – Once you’re happy with the shape of the hair, take your red temporary hair color spray and spray your child’s hair so that it’s completely red. If you want to take the look one step further, have your child cover their eyes and carefully spray their eyebrow hairs red too! Clean up any extra spray on their face.
Finishing Touches – To finish off the look, place the headband with horns in the middle of your child’s head. Adjust the hair around it as needed. Now you have a look that’s sure to catch Princess Peach’s eye!
Optional: To get the full effect, use green face paint to paint the top half of your child’s face!