Fun Styles
Valentine’s Day is right around the corner and with the holiday comes a variety of fun events. Whether it is a Daddy-Daughter Dance or a party at school, we love any excuse to get dolled up. Below are some easy and sweet styles that will make anyone feel like a fierce, loveable princess.
Be sure to check out our YouTube channel and other posts for more fun tutorials.
Twist Wrap Ponytail
What You’ll Need
- Comb or brush
- Spray bottle
- Hair elastics
- Hairspray (optional)
What You’ll Need
- Comb or brush
- Spray bottle
- Hair elastics
- Hairspray (optional)
- Create the Ponytail – Pull the hair back into a ponytail and secure it with a hair elastic.
NOTE: You can section off a small piece of hair from the ponytail and wrap it around the hair elastic to hide it from view. - Making a Rope Twist – Separate a small section of hair from one side of the ponytail and split it into two. Begin twisting each strand, separately, towards the right. To create the rope twist, take the two twisted strands and twist them around each other towards the left. Continue this all the way down and secure with a hair elastic.
Next, grab a small section of hair from the opposite side of the ponytail and repeat the steps above to create another rope twist. Secure the rope twist with a hair elastic.
With the untwisted hair remaining in the ponytail, you will start to create a rope twist and secure it with a hair elastic. You should now have two small rope twists on and a larger rope twist in the center. - Intertwine – Holding the larger rope twist and the right rope twist, wrap the right rope twist around the larger once, following the twist pattern.
Now take the left rope twist and wrap it around the larger rope twist once.
Continue alternating the wrapping until you get to the end of the larger rope twist. Secure with a hair elastic.
Finish off with hairspray to tame any frizz or flyaways! - Optional: Add a cute hair bow at the end.
Criss-Cross Braids
What You’ll Need:
- Comb or brush
- Hair elastics
- Clip
Before You Begin:
Be sure to comb any tangles out so that it is easier to braid. For a more advanced style, French braid your child’s hair into pigtails!
- Part the Hair – Section the top of the hair away from the bottom. From the top section, create two pigtails. Take the remaining hair and section it down the middle into two sections. After parting your child’s hair, secure one side with a hair clip to keep it out of the way.
- Create 2 Braids – Take the unsecured side and separate it into three small sections of hair of equal size near the crown of the head. Braid these three sections together all the way down. Secure with an elastic.
Repeat with the secured section.
Optional – Try a French Braid for a More Advanced Style View our Tutorial - Make a Ponytail – Take the remaining hair and secure it with a hair elastic, creating a larger pigtail at the bottom.
- Combine the Braids – Once the top two braids are complete, cross the braids at the top of the ponytail and secure with a hair elastic. Remove the hair elastics at the end of of the braids.

Side Banded Ponytail
What You’ll Need:
- Parting Comb
- Leave-in conditioner
- Bright, multicolor hair elastics
- Detangling spray (for 2nd or 3rd days)
- Section the Hair – Brush all hair to one side. Part a small section horizontally near the front of the head. Smooth the hair down and apply leave-in conditioner to lock in moisture.
- Create Small Banded Ponytails – Begin with the small section. Using the parting comb, section a small section and secure it with a hair elastic. Add hair elastics down small, horizontal sections of hair as you move down the ponytail, and secure each part with different colors of hair elastic. Detangle each section as you work.
Continue with as many rows as preferred. - Combine the Sections – Now combine the remaining, unsecured sections into a larger ponytail and secure. Take the banded ponytails and secure them to the larger ponytail. Add a cute hair bow or accessory to the bottom of the ponytail.

Bubble Braid
What You’ll Need:
- Comb or brush
- Hair elastics
- Hairspray (Optional)
This is a great, low-maintenance, high-glam look that is great for most hair types.
What You’ll Need:
- Comb or brush
- Hair elastics
- Hairspray (Optional)
This is a great, low-maintenance, high-glam look that is great for most hair types.
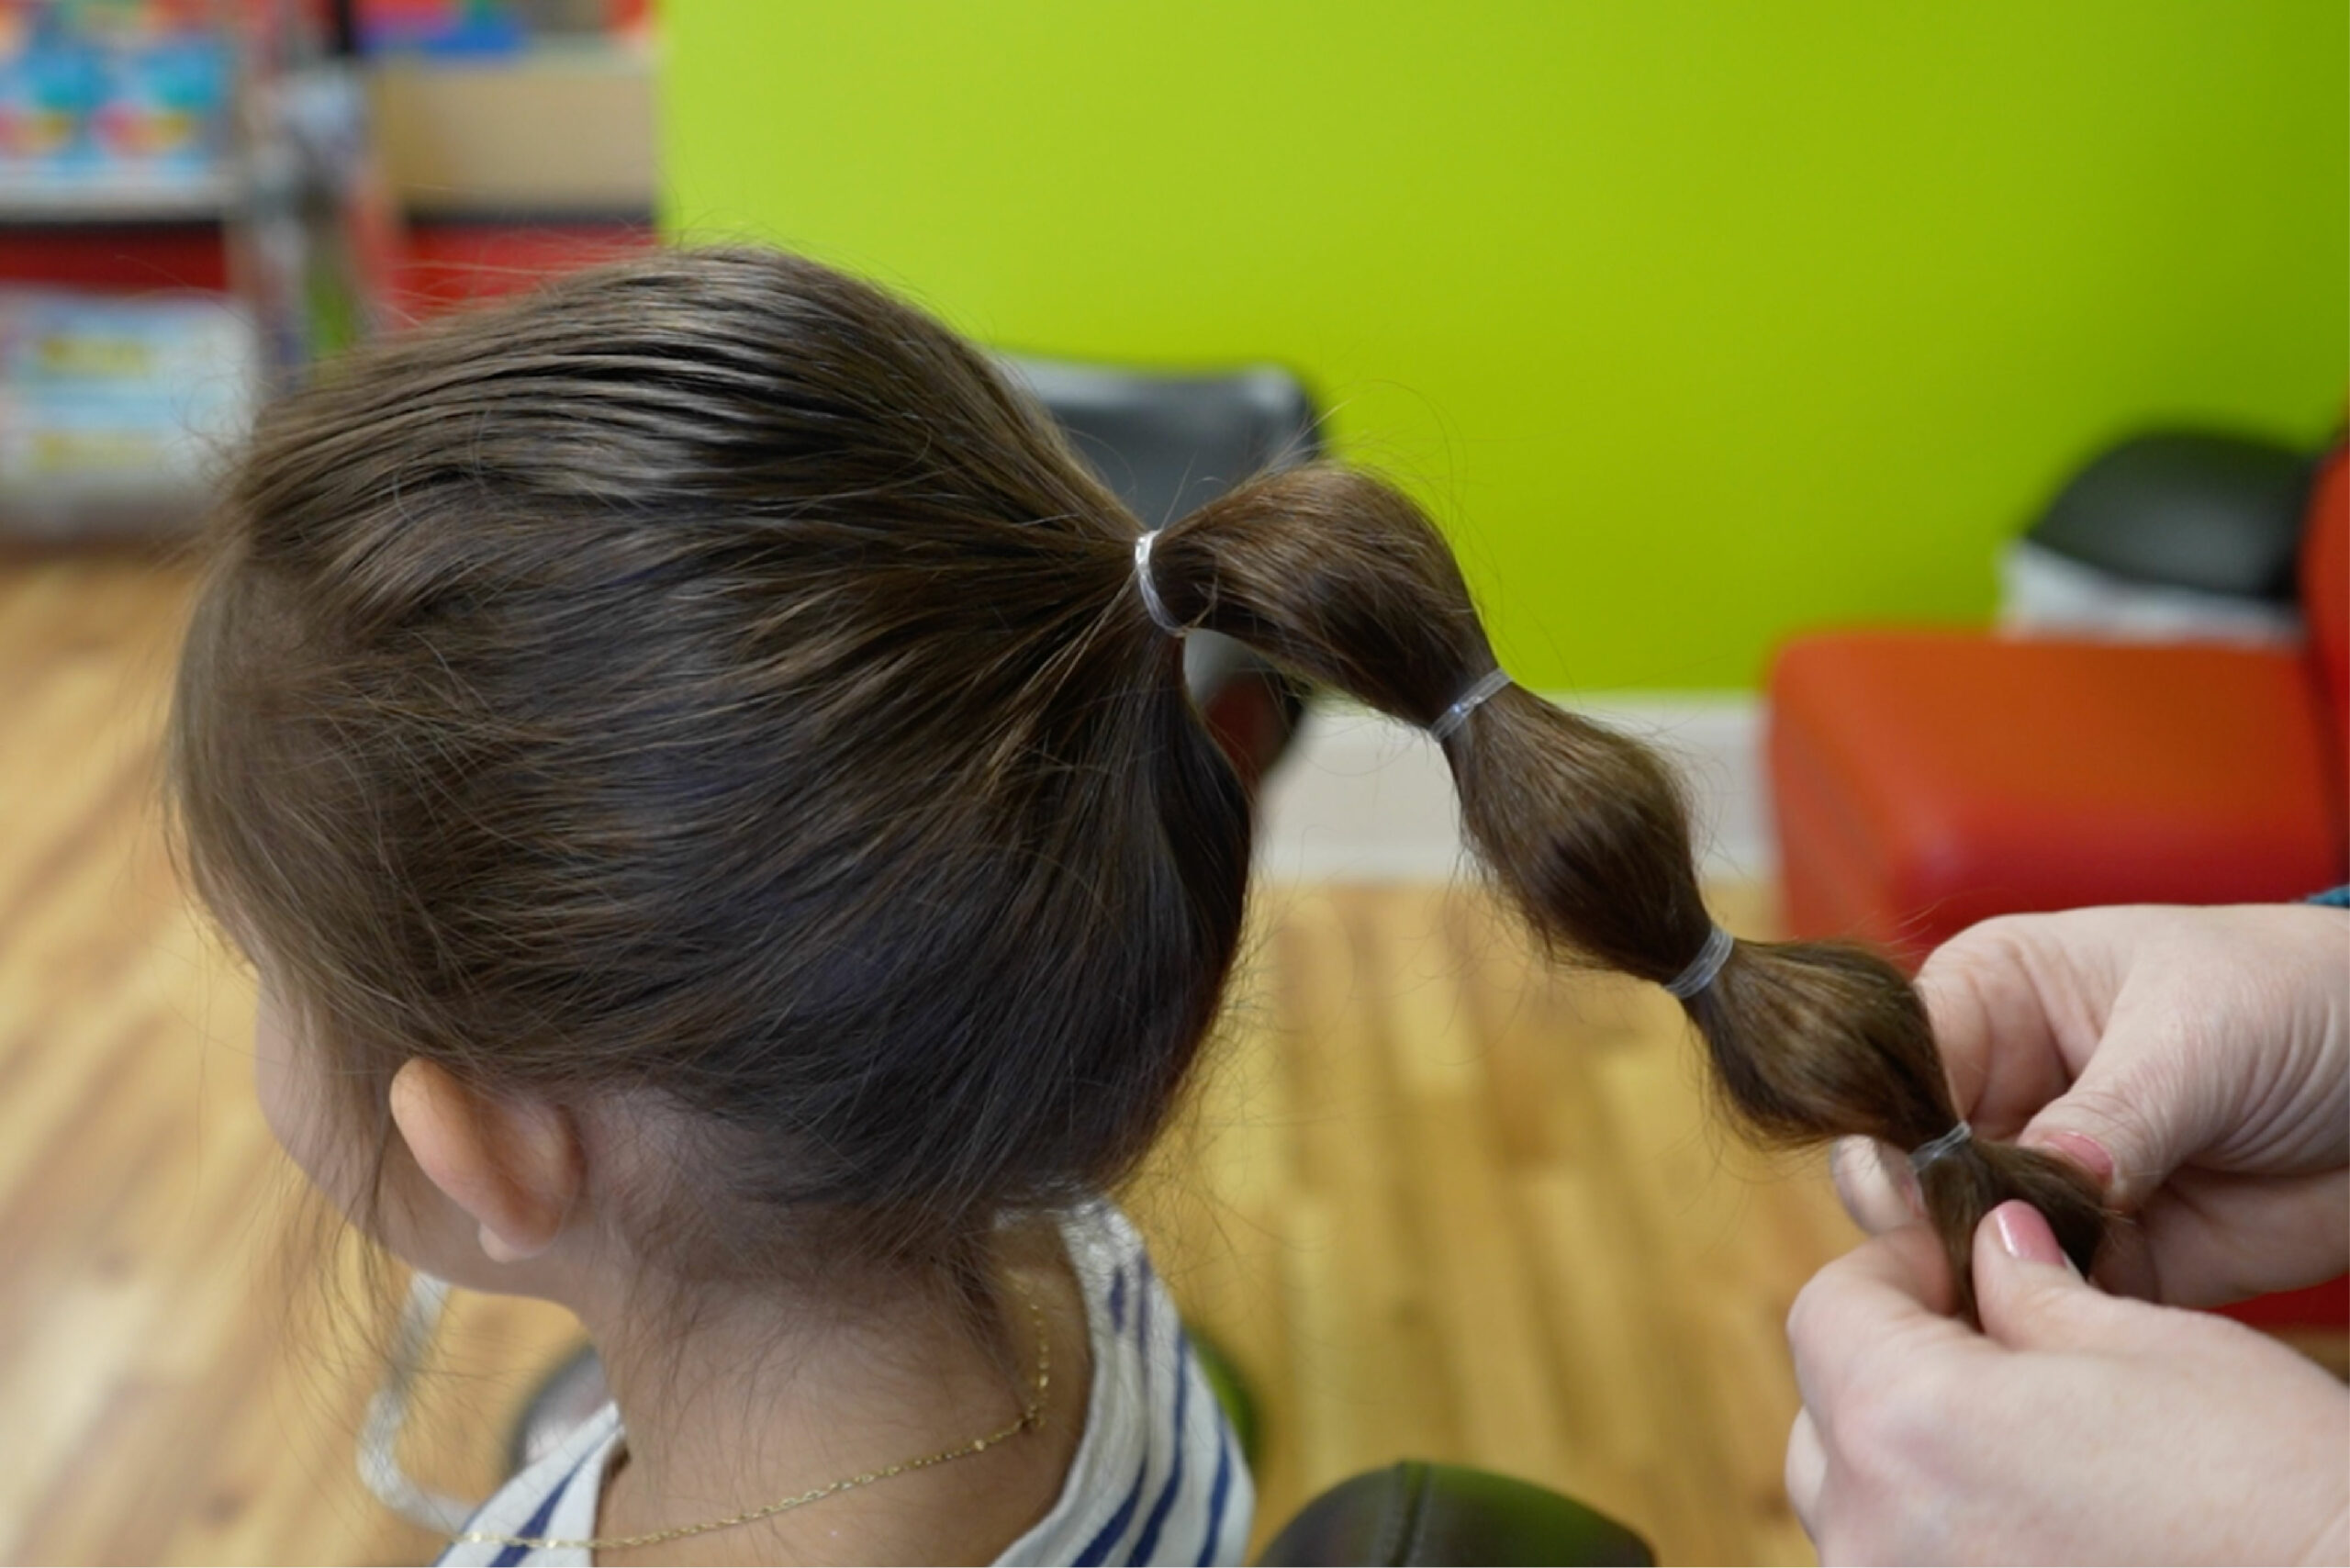
Create a Ponytail – Pull the hair back into a ponytail and secure it with a hair elastic.
Add More Hair Elastics – Wrap another hair elastic a few inches down your ponytail. Continue adding elastics all the way down the ponytail. Depending on the length of hair, keep the elastics spaced evenly.
Making Bubbles – With all the hair elastics in place, use your fingers to tease, tug and pull at each section (not too much). Continue teasing each section.
Finish off with hairspray to tame any frizz or flyaways!
Optional: Using a leave-in conditioner on damp hair will help reduce breakage or strain from leaving the hair elastics in for a longer period of time.Optional: Try making bubble braid pigtails.
Cute Headband
What You’ll Need:
- Comb or brush
- Preferred headband
Looking for a quick and easy way to add some flair? A cute headband will keep their hair out of their way and make getting ready simple. Your local Pigtails & Crewcuts salon offers a wide variety of headband options.
- Prepare the Hair – Begin by brushing the hair, parting it how it would normally fall. Be mindful of any tangles and flyaways.
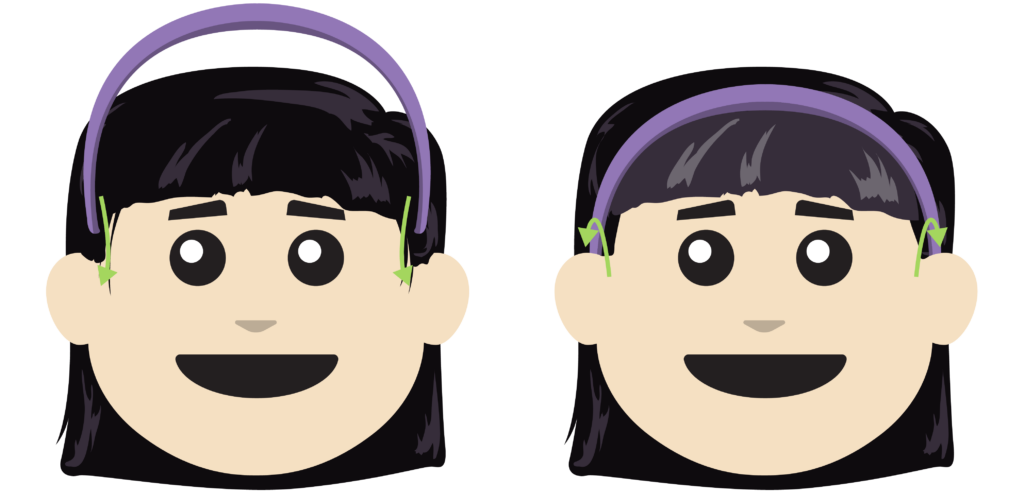
- Grab the Headband – Place the ends of headband just above and in front the ears. Gently move the ends behind the ears, bringing down the top of the headband. This will secure the headband in place.


